
GitHub PagesでブログをするためにJekyllを使ってみました。 費用がかからないのに広告も出ないので良いです。
環境
- OS X El Capitan バージョン 10.11.2
- git バージョン 2.5.4 (Apple Git-61)
- RubyGems バージョン 2.5.1
- Bundler バージョン 1.11.0
- Jekyll バージョン 2.4.0
Jekyll?
プレーンテキストから静的な Web サイトやブログを作成しましょう。
シンプル データベース、コメント管理、やっかいなアップデートのインストールは不要です。 — あなたのコンテンツに集中できます。
GitHubリポジトリーの作成
Xcodeコマンドラインツールを先にインストールしておきます。
GitHubに先にサインアップしておきます。
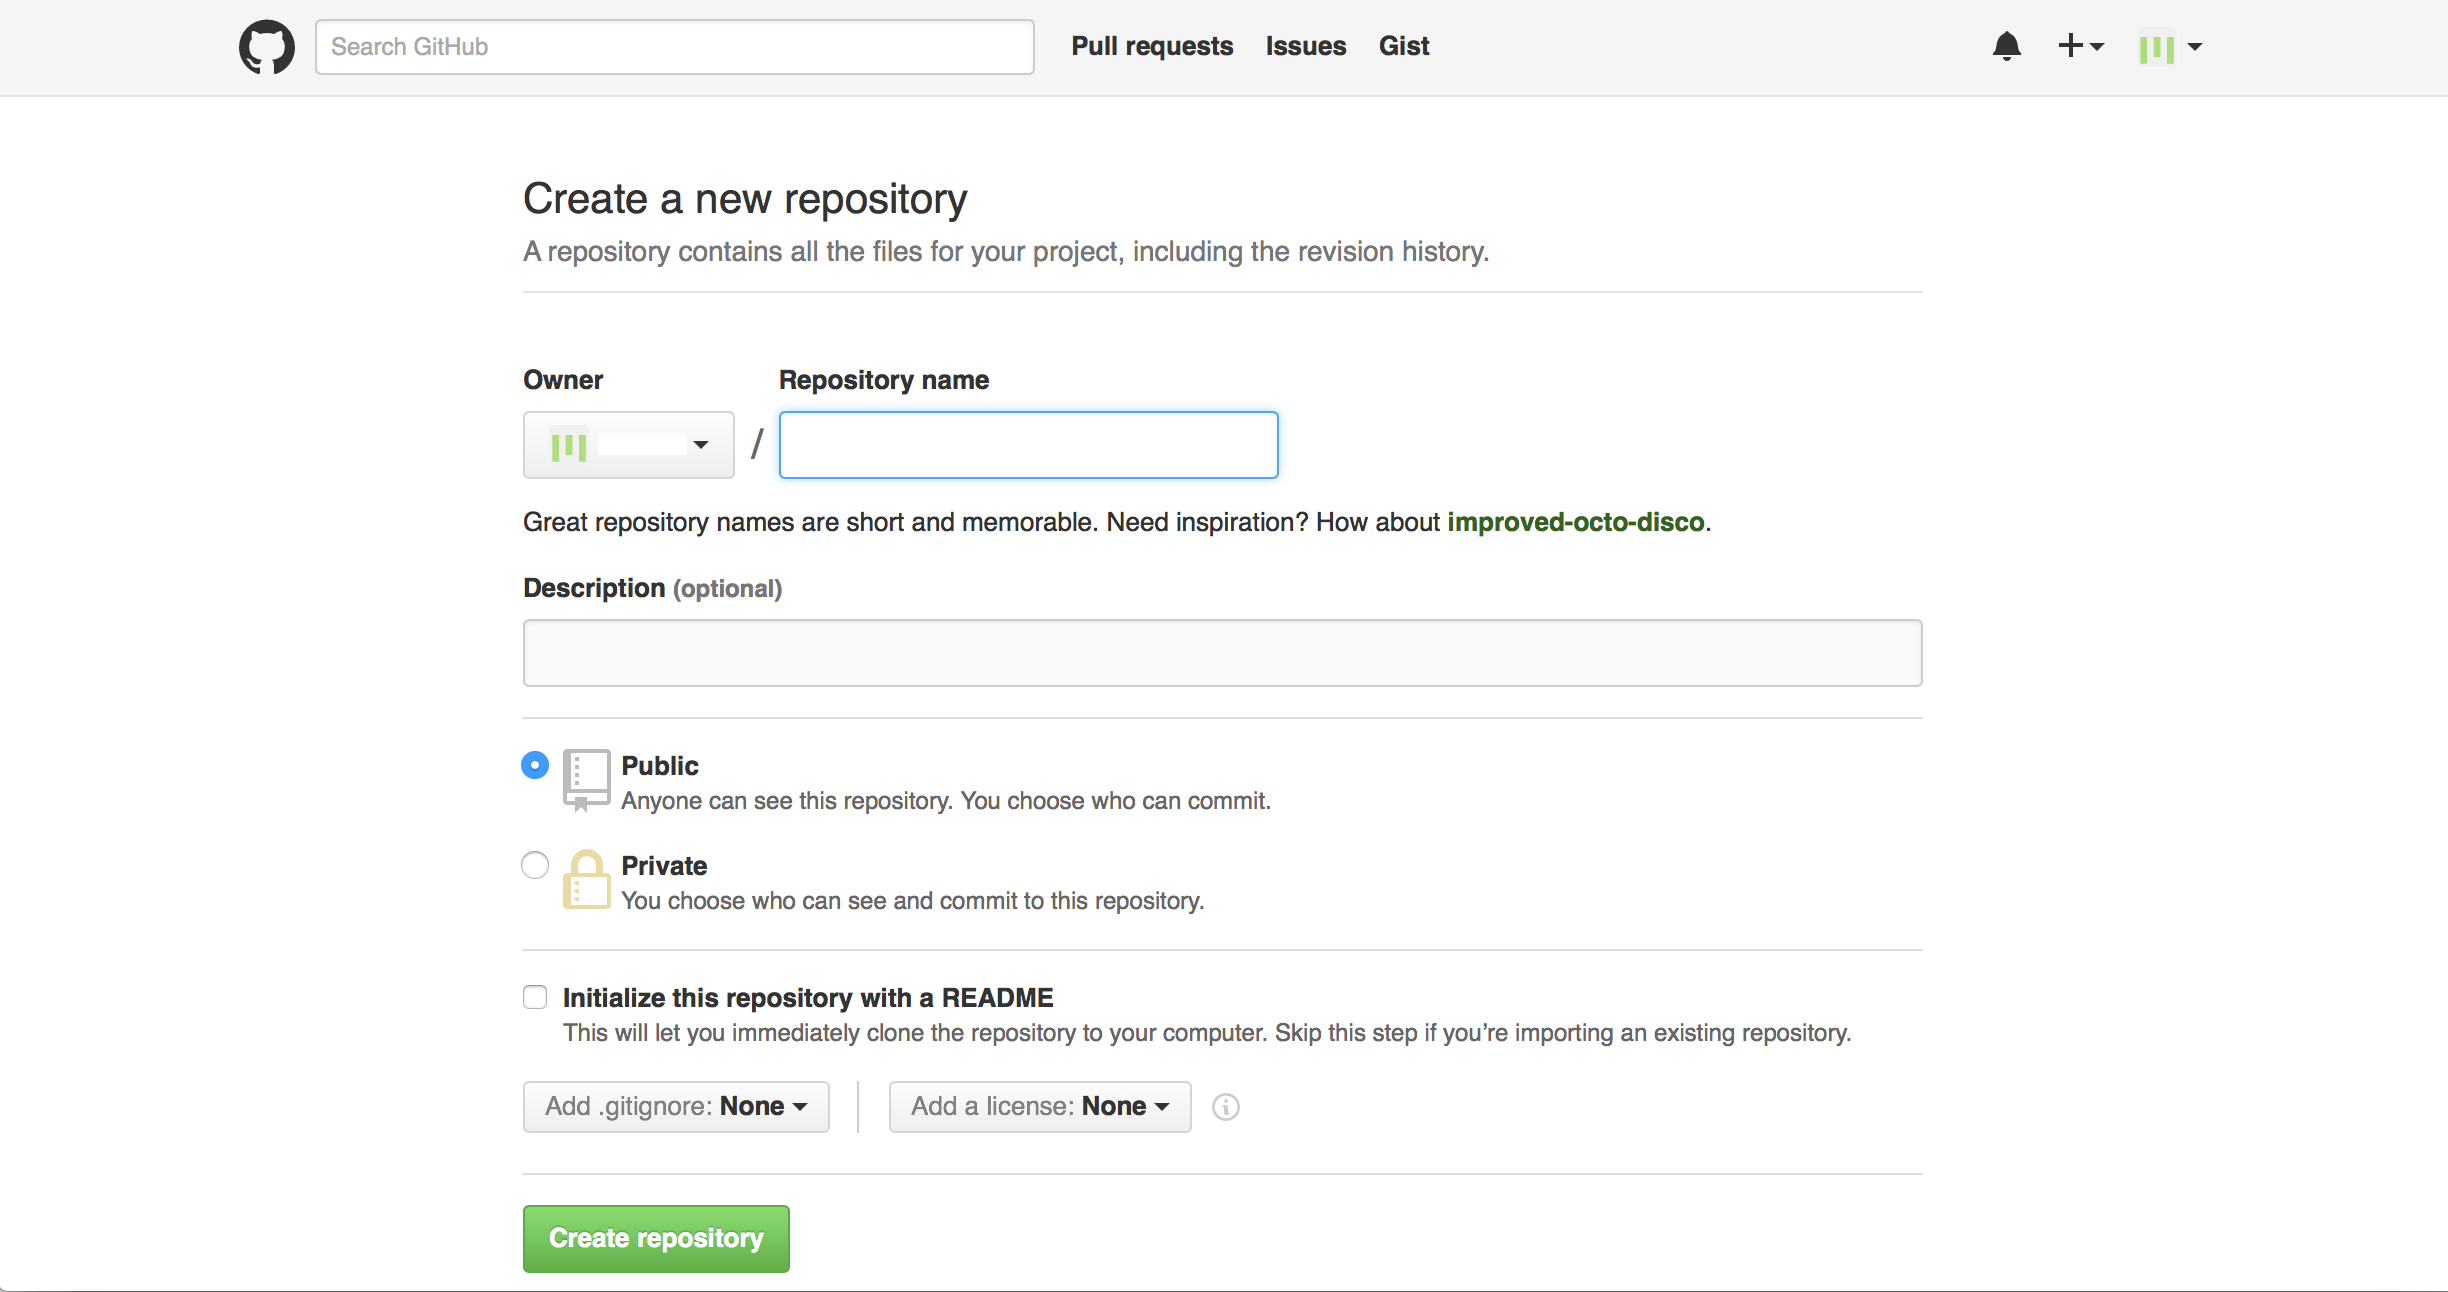
ブラウザからGitHubにサインインしてCreate a new repositoryにアクセスします。
Repository nameに[username].github.ioと入力します。
このサイトの場合はva2577.github.ioと入力しました。
Descriptionにこのリポジトリーの説明を入力します。
必須ではないので入力しなくてもいいし、何のリポジトリーか自分がわかる程度の内容で入力すればいいと思います。
次はPublicを選択します。
Privateを選択するとリポジトリーを非公開にできるけど費用がかかるようです。
Initialize this repository with a READMEはこのブログのソースを誰かに公開するわけではないし、後からREADMEを登録することもできるためチェックしないでいいと思います。
Create repositoryボタンをクリックします。
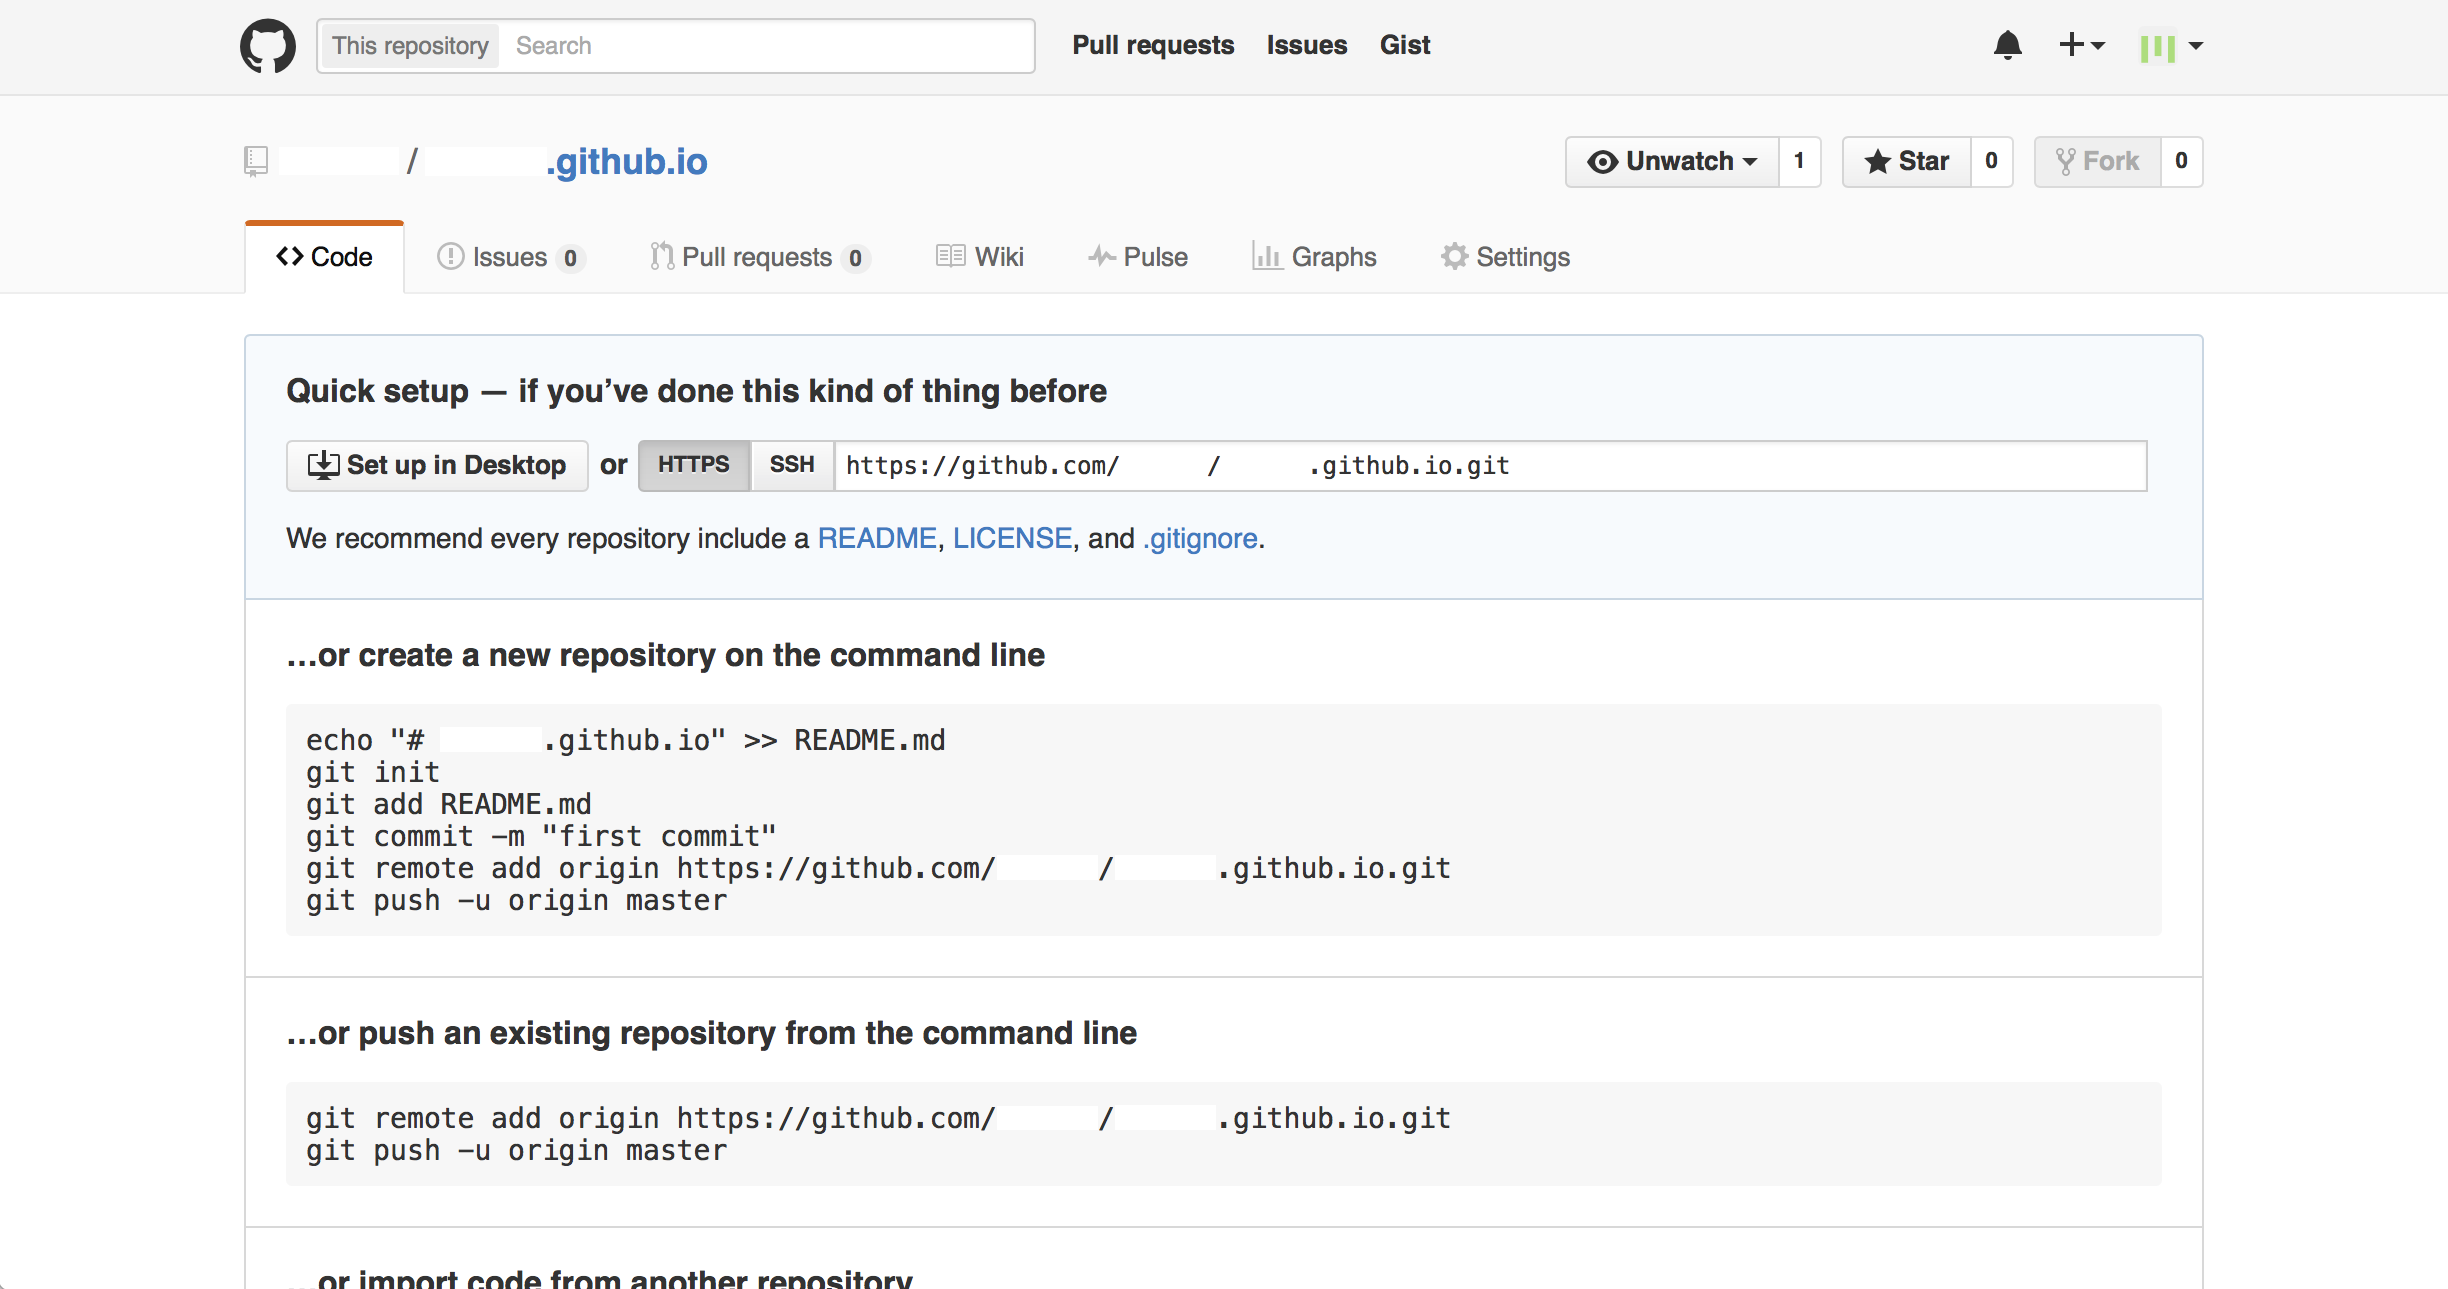
リポジトリーを作成すると次にする操作が記載されています。
ターミナルから記載されているコマンドの通りに進めていきたいと思います。
Bundlerのインストール
Bundlerをインストールします。
$ gem install bundler
You don't have write permissions for the /Library/Ruby/Gems/2.0.0 directory.のようなエラーが出る場合は、RubyGemsのホームが設定されていないと思いますので、先に設定しておきます。
Jekyllのインストール
github-pagesというパッケージをインストールすると必要なものがまとめてインストールできるようです。
ここでは./vendor/bundleにインストールするようにしています。
$ echo "source 'https://rubygems.org'" >> Gemfile
$ echo "gem 'github-pages'" >> Gemfile
$ bundle install --path vendor/bundle
Fetching gem metadata from https://rubygems.org/............
Fetching version metadata from https://rubygems.org/...
Fetching dependency metadata from https://rubygems.org/..
Resolving dependencies...
Rubygems 2.0.14 is not threadsafe, so your gems will be installed one at a time. Upgrade to Rubygems 2.1.0 or higher to enable parallel gem installation.


Your user account isn't allowed to install to the system Rubygems.
  You can cancel this installation and run:

      bundle install --path vendor/bundle

  to install the gems into ./vendor/bundle/, or you can enter your password
  and install the bundled gems to Rubygems using sudo.

  Password:
Installing RedCloth 4.2.9 with native extensions
Installing i18n 0.7.0
Installing json 1.8.3 with native extensions
Installing minitest 5.8.3
Installing thread_safe 0.3.5
Installing addressable 2.3.8
Installing blankslate 2.1.2.4
Installing fast-stemmer 1.0.2 with native extensions
Installing coffee-script-source 1.10.0
Installing execjs 2.6.0
Installing colorator 0.1
Installing ffi 1.9.10 with native extensions
Installing multipart-post 2.0.0
Installing gemoji 2.1.0
Installing net-dns 0.8.0
Installing public_suffix 1.5.3
Installing jekyll-paginate 1.1.0
Installing sass 3.4.20
Installing rb-fsevent 0.9.6
Installing kramdown 1.9.0
Installing liquid 2.6.2
Installing mercenary 0.3.5
Installing posix-spawn 0.3.11 with native extensions
Installing yajl-ruby 1.2.1 with native extensions
Installing redcarpet 3.3.3 with native extensions
Installing safe_yaml 1.0.4
Installing jekyll-feed 0.3.1
Installing mini_portile2 2.0.0
Installing jekyll-sitemap 0.9.0
Installing maruku 0.7.0
Installing rdiscount 2.1.8 with native extensions
Installing terminal-table 1.5.2
Using bundler 1.11.0
Installing tzinfo 1.2.2
Installing parslet 1.5.0
Installing classifier-reborn 2.0.4
Installing coffee-script 2.4.1
Installing ethon 0.8.0
Installing rb-inotify 0.9.5
Installing faraday 0.9.2
Installing jekyll-sass-converter 1.3.0
Installing pygments.rb 0.6.3
Installing nokogiri 1.6.7 with native extensions
Installing activesupport 4.2.5
Installing toml 0.1.2
Installing jekyll-coffeescript 1.0.1
Installing typhoeus 0.8.0
Installing listen 3.0.5
Installing sawyer 0.6.0
Installing html-pipeline 1.9.0
Installing github-pages-health-check 0.5.3
Installing jekyll-watch 1.3.0
Installing octokit 4.2.0
Installing jekyll-gist 1.4.0
Installing jekyll 2.4.0
Installing jekyll-mentions 0.2.1
Installing jekyll-redirect-from 0.8.0
Installing jemoji 0.5.0
Installing github-pages 40
Bundle complete! 1 Gemfile dependency, 59 gems now installed.
Use `bundle show [gemname]` to see where a bundled gem is installed.
Post-install message from html-pipeline:
-------------------------------------------------
Thank you for installing html-pipeline!
You must bundle Filter gem dependencies.
See html-pipeline README.md for more details.
https://github.com/jch/html-pipeline#dependencies
-------------------------------------------------
雛形の取得
newというサブコマンドを実行することでサイトの雛形ができます。
JekyllのパッケージをBundlerでインストールしているため、最初にbundle execをつけて実行しています。
[YOUR-JEKYLL-SITE]のところは任意のディレクトリーの名前に変えます。
$ bundle exec jekyll new [YOUR-JEKYLL-SITE]
New jekyll site installed in [directory]/[YOUR-JEKYLL-SITE].
ローカルで確認
作ったサイトをローカルで確認するためにサーバーを実行します。
$ cd [YOUR-JEKYLL-SITE]
$ bundle exec jekyll serve
Configuration file: [directory]/YOUR-JEKYLL-SITE/_config.yml
            Source: [directory]/site
       Destination: [directory]/YOUR-JEKYLL-SITE/_site
      Generating...
                    done.
 Auto-regeneration: enabled for '[directory]/site'
Configuration file: [directory]/YOUR-JEKYLL-SITE/_config.yml
    Server address: http://0.0.0.0:4000/
  Server running... press ctrl-c to stop.
ブラウザから http://localhost:4000 にアクセスします。
サーバーを停止するにはctrl + cを押します。
GitHub Pagesで公開
gitを先に設定しておきます。
GitHubにpushすることで公開できます。
Macの隠しファイルである.DS_Storeはgitのバージョン管理から除外します。
[username]のところはGitHubのusernameに変えます。
$ echo ".DS_Store" >> .gitignore
$ git init
$ git add .
$ git commit -m "first commit"
$ git remote add origin https://github.com/[username]/[username].github.io.git
$ git push origin master
GitHubにpushした後に数十秒程度待ってからGitHub Pagesにアクセスすると公開されます。 https://[username].github.io
終わり
まだ雛形だけのブログなのでシンプルすぎますが、少しずつコンテンツを増やしていきたいと思います。
参考
10 January 2016 追記
Jekyllの記事の投稿について書きました。