前回の記事では、 Pagination を使ってみました。 今回は、 RSS と Sitemap と Robots.txt を使ってみます。
最初に、この記事の通り、サイトとテーマの骨組みを作成しておきました。
環境
- Hugo Static Site Generator v0.38.2
RSS Templates
RSS Templates Hugo ships with its own RSS 2.0 template that requires almost no configuration, or you can create your own RSS templates.
Hugo は、何も設定しなくても RSS 2.0 の仕様に沿ったファイルを作成してくれるようです。
The Embedded rss.xml
This is the default RSS template that ships with Hugo. It adheres to the RSS 2.0 Specification.
<rss version="2.0" xmlns:atom="http://www.w3.org/2005/Atom">
  <channel>
    <title>{{ if eq  .Title  .Site.Title }}{{ .Site.Title }}{{ else }}{{ with .Title }}{{.}} on {{ end }}{{ .Site.Title }}{{ end }}</title>
    <link>{{ .Permalink }}</link>
    <description>Recent content {{ if ne  .Title  .Site.Title }}{{ with .Title }}in {{.}} {{ end }}{{ end }}on {{ .Site.Title }}</description>
…略…
これが Hugo の標準の RSS template のようです。
詳しくないのですが、 1 行目の <rss version="2.0" xmlns:atom="http://www.w3.org/2005/Atom"> の記述について、 RSS 2.0 なのか、 ATOM 1.0 なのか、分からない始まり方しているように見えます。
今後の展望
RSS 1.0 と RSS 2.0 の関係について、バージョンを表す数値の大小関係から、前者が旧規格で後者が後継規格であるという誤解が見受けられるが、これは事実ではない。RSS 2.0 はシンプルさの代償として RSS 1.0 の備える(RDFによる)強力な表現力を放棄したため、RSS 1.0 を置き換えるものではない。従って RSS 1.0 は場面に応じて今後も継続利用されていくと目される。[要出典]
…略…
今日において、RSS 1.0、RSS 2.0 そして Atom は、いずれにも集約されることなく各々が広く普及している。RSSリーダーの多くはそれら全てに対応しており、一方のウェブサイト側も、フィード配信のためにそれらのうち複数を利用することも珍しくない。
RSS 1.0, RSS 2.0, Atom 1.0 と、それぞれ事情があるようです。 Hugo で複数のフィード配信ができるようには見えませんでした。 できることは、 Lookup Order for RSS Templates の優先度の高いファイルを作成して、いずれか一つの仕様に合わせておくことくらいかな。
今回は、 Hugo の標準の RSS template を使ってみます。
content
次のファイルを作成しておきました。
$ install -d content/post
$ for i in $(seq -f %02g 1 31)
do
cat <<word > content/post/post-${i}.md
---
title: post ${i} title
date: 2018-01-${i}
---
This is post ${i} *content*.

This is paragraph **2**.

This is paragraph ***3***.
word
done
Hugo のサーバーで確認
次のコマンドを入力して Hugo のサーバーを起動しました。
$ hugo -t <THEMENAME> server
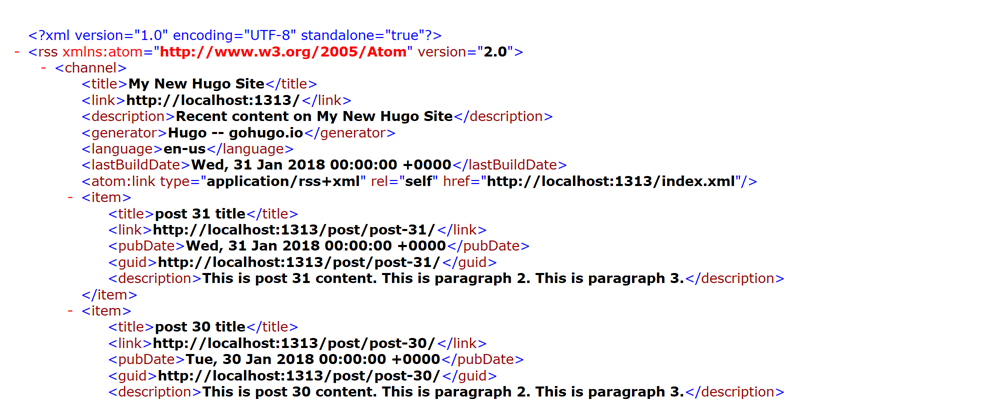
http://localhost:1313/index.xml にアクセスしました。 すると、次のようなページが表示されました。

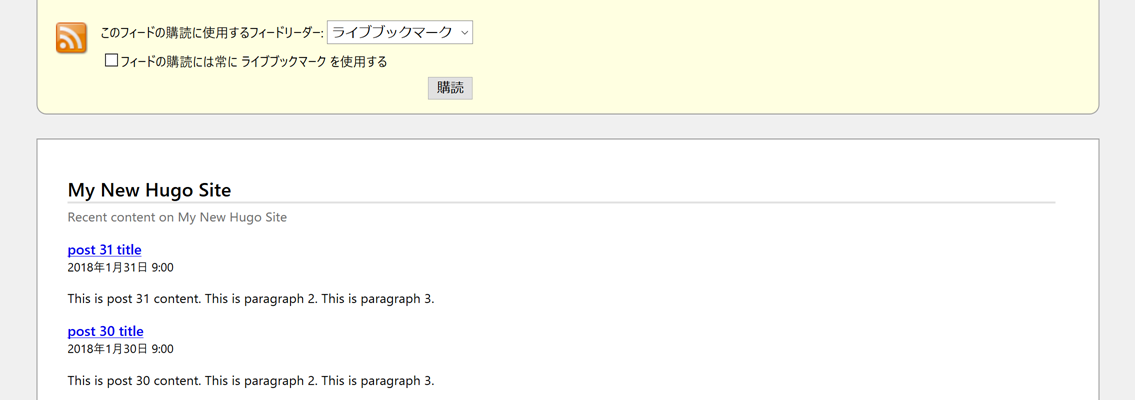
上のは Microsoft Edge でアクセスしたものです。 Firefox でアクセスすると、フィードリーダーの購読ボタンとか表示されました。

ここで確認したのは Homepage のアドレスだけでしたが、 Section ごとにも RSS は作成されているようで、 http://localhost:1313/post/index.xml では post Section の RSS が確認できました。
Ctrl + C で Hugo のサーバーを終了しておきます。
RSS Templates のまとめ
RSS は使ったことがないので、どれくらい一般的な需要があるのかわからないのですが、 Hugo が自動的に作成してくれるので確認してみました。 使っている人いるのかな。
Sitemap Template
Sitemap Template
Hugo ships with a built-in template file observing the v0.9 of the Sitemap Protocol, but you can override this template if needed.
Hugo は、何も設定しなくても、 Sitemap Protocol v0.9 の仕様に合わせたファイルを作成してくれるようです。
If provided, Hugo will use /layouts/sitemap.xml instead of the internal sitemap.xml template that ships with Hugo.
必要であれば /layouts/sitemap.xml を作成することでオーバーライドすることができるようです。
今回は、 Hugo の標準の Sitemap を使ってみます。
content
RSS Templates で作成した content をそのまま使います。
Hugo のサーバーで確認
次のコマンドを入力して Hugo のサーバーを起動しました。
$ hugo -t <THEMENAME> server
http://localhost:1313/sitemap.xml にアクセスしました。 すると、次のようなページが表示されました。

<url> の中に <loc> と <lastmod> しか出力されていなかったのですが、 <changefreq> と <priority> は設定ファイルに設定しておくもののようでした。
Configure sitemap.xml
Defaults for <changefreq>, <priority> and filename values can be set in the site’s config file, e.g.:
config.toml
[sitemap]
  changefreq = "monthly"
  filename = "sitemap.xml"
  priority = 0.5
あまり効果はよくわからないですが、必要そうなら設定しておこうと思います。
Ctrl + C で Hugo のサーバーを終了しておきます。
Sitemap Template のまとめ
Sitemap を作成しておくと、検索エンジンに早くインデックスを作ってもらえるようです。 実際の効果はどうかわからないのですが、 Hugo がほぼ自動的に作ってくれるのでそのまま使おうと思います。
Robots.txt File
Robots.txt File
Hugo can generate a customized robots.txt in the same way as any other template.
To create your robots.txt as a template, first set the enableRobotsTXT value to true in your configuration file. By default, this option generates a robots.txt with the following content, which tells search engines that they are allowed to crawl everything:
User-agent: *
Hugo は、設定ファイルに enableRobotsTXT = true と記述することで、 robots.txt を作成してくれるようです。
標準では、すべてのコンテンツに対してクロールを許可する設定になっているようです。
Robots.txt Template Lookup Order
The lookup order for the robots.txt template is as follows:
- /layouts/robots.txt
- /themes/<THEME>/layouts/robots.txt
If you do not want Hugo to create a default robots.txt or leverage the robots.txt template, you can hand code your own and place the file in static. Remember that everything in the static directory is copied over as-is when Hugo builds your site.
layouts/robots.txt や static/robots.txt を作成することでカスタマイズできるようです。
今回は、 Hugo の標準の robots.txt を作成してみます。
config.toml
設定ファイル (config.(yaml|toml|json)) に次の記述を追加しました。 TOML の例です。
enableRobotsTXT = true
Hugo のサーバーで確認
次のコマンドを入力して Hugo のサーバーを起動しました。
$ hugo -t <THEMENAME> server
http://localhost:1313/robots.txt にアクセスしました。 すると、次のようなページが表示されました。

Robots.txt File のまとめ
Google がサポートする非グループ メンバー レコード
sitemap
Google、Ask、Bing、Yahoo でサポートされます。sitemaps.org に定義されています。
使用方法:
sitemap: [absoluteURL][absoluteURL] にはサイトマップ、サイトマップ インデックス ファイル、または同等の URL を指定します。この URL は robots.txt ファイルと同じホスト上でなくてもかまいません。複数の sitemap エントリを指定できます。非グループ メンバー レコードであるため、特定のユーザーエージェントには関連付けられません。すべてのクローラが使用できます(不許可に指定されているクローラを除く)。
サイトマップをクローラーに知らせるには、 robots.txt に sitemap: https://domain.jp/sitemap.xml のように記述すると良いそうです。
この domain.jp は自分のサイトに合わせて変更します。
終わり
RSS, Sitemap, Robots.txt のいずれもほぼ自動的に Hugo が作ってくれるので、そのまま使おうと思います。